


The Pabloskates Guide to the Most Useful Skate Tools & Gadgets You Can Buy on Amazon

Updated: Aug 29
Whether you're restoring an old pair of Bauer hockey boots, fitting new plates to your latest quad conversion or simply keeping your skates looking their best, having the right tools can make a huge difference.
Over the years, I've built, restored and repaired hundreds of pairs of roller skates in the Pabloskates workshop. Along the way I've discovered that some of the most useful items aren't specialist skate tools at all. Many are inexpensive gadgets originally designed for completely different jobs but have become indispensable when cleaning, restoring, repairing and maintaining skates.
This guide brings together the products I genuinely use, or would happily recommend, to anyone working on their own skates. Some are workshop essentials that get used almost every day, while others only come out for specific jobs, but every item has earned its place through experience rather than marketing.
Where possible, I've included practical advice on how each product is used in the workshop, what to look out for before buying and whether it's something every skater needs or just a useful addition for those who enjoy working on their own equipment.
Who is this guide for?
Whether you're restoring vintage hockey boots, building your first pair of custom quad skates, maintaining your current setup or simply wondering what tools are actually worth buying, this guide contains the products I genuinely use in the Pabloskates workshop. I've deliberately avoided recommending expensive specialist equipment unless I believe it's genuinely worthwhile.
Disclosure: This page contains Amazon Associate links. If you choose to purchase through one of these links, Pabloskates may earn a small commission at no extra cost to you. Every penny helps support the workshop, allowing us to continue creating free skate guides, tutorials and restoration content for the skating community.
Emergency Skate Bag Essentials
You never know when something might come loose or break during a skate session. Keeping a few basic tools and spares in your skate bag can often save the day and stop a great session ending early. The good news is that most of these items are inexpensive, lightweight and take up very little room.
🛼 T-Tool or Skate Tool
A dedicated skate tool covers most common adjustments, including axle nuts, kingpin nuts and toe stops (depending on the model). If you only carry one tool, make it this one.
🔧 Small Socket or Spanner Set
Most quad skates use:
8mm for plate mounting nuts. Buy from Amazon
13mm for axle nuts. Buy from Amazon
14mm for kingpin nuts. Buy from Amazon
Even if you already own a T-tool, a small socket set often makes adjustments quicker and easier.
⚙️ Spare Bearings
A damaged or seized bearing can ruin an entire session. Keeping a spare set (or even just a few individual bearings) means you're back skating within minutes.
🛞 Spare Axle Nuts
They're tiny, easy to lose and almost impossible to find once dropped on a path or rink floor. A couple of spare axle nuts weigh virtually nothing.
🥅 Spare Toe Stop
If you're using adjustable toe stops, keep a spare in your bag. A worn or damaged toe stop can become unsafe surprisingly quickly.
👟 Spare Laces
Broken laces always seem to happen at the worst possible moment. A spare pair takes up almost no space and can rescue a session.
🔩 Mounting Hardware
If you've built your own skates, carry a couple of spare mounting nuts and bolts. They rarely come loose if fitted correctly, but replacements are invaluable if one goes missing.
🧻 Microfibre Cloth
Perfect for wiping wet boots, cleaning wheels or giving your skates a quick clean before putting them back in the bag.
🩹 Small First Aid Kit
Blister plasters, antiseptic wipes and a couple of dressings are worth carrying, especially if you're skating outdoors or in a group.
🧤 Disposable Gloves
Handy if you need to work on dirty bearings or greasy components without covering your hands in grime.
🔦 Small Torch
If you're skating outdoors into the evening, a small LED torch makes finding dropped nuts, washers or bearings far easier.
Cleaning & Restoration
One of the most satisfying parts of working on roller skates is bringing tired, well-used boots back to life. Years of dirt, scuffs, faded logos and neglected leather can often make a pair of skates look beyond saving, but with the right products and a little patience, the transformation can be amazing.
The products in this section are the ones I regularly use in the Pabloskates workshop to clean, restore and refresh vintage hockey boots before they're converted into custom quad roller skates. From removing years of grime and reviving faded plastics to restoring leather and touching up worn logos, these are the products that consistently deliver the best results without costing a fortune. Whether you're carrying out a full restoration or simply giving your skates a well-earned clean, they're a great place to start.
Fabric Shaver

What it does: Removes bobbles, lint and loose fibres from skate liners, tongues and fabric panels, helping older skates look much cleaner and better cared for.
Why I use it: Perfect for restoring used hockey boot tongues, inner liners and inner soles before they're converted to quads. It's surprising how much fresher a pair of boots can look after just a few minutes with a fabric shaver.
Top Tip: Use light pressure and keep the fabric taut. Avoid using it on thin mesh materials or around loose stitching.
Pabloskates Rating: ⭐⭐⭐⭐⭐ Workshop Essential
View on Amazon: https://amzn.to/4vA5Aeg
Leather, Vinyl & Fabric Dye

What it does: Leather, vinyl and fabric dyes are an excellent way to revive tired-looking skates by restoring faded colour, covering scuffs, disguising stains or changing the look of a boot completely. Available in a wide range of colours, they can dramatically improve the appearance of well-used boots without affecting their performance.
Why I use it: I regularly use dye during skate restorations to breathe new life into older hockey boots before they're converted into quad roller skates. It's particularly useful for black boots that have faded to grey over time or have picked up scratches and marks that won't clean off. A carefully applied coat of dye can make a huge difference to the finished result.
Top Tip: Always clean the surface thoroughly before applying dye and allow plenty of drying time between coats. Several thin coats usually produce a far more even and durable finish than one heavy application. If you're changing colour completely, test the dye on a small hidden area first to ensure you're happy with the result.
Pabloskates Rating: ⭐⭐⭐⭐⭐ Workshop Essential
View on Amazon: https://amzn.to/3R30ZDk
White Paint Pen

What it does: A white paint pen is perfect for restoring faded logos, lettering and white plastic details on roller skates. It provides excellent coverage over scuffs and worn areas, helping older skates regain a clean, factory-fresh appearance.
Why I use it: This has become one of my favourite restoration tools in the Pabloskates workshop. I regularly use a white paint pen to restore faded Bauer logos on modern hockey boots, bringing back the crisp white finish that often wears away with use. It's a simple, inexpensive product that can make a surprisingly big difference to the finished look of a pair of skates.
Top Tip: Shake the pen thoroughly before use and test the flow on a piece of scrap paper first. Apply several light coats rather than trying to achieve full coverage in one pass, and allow each coat to dry before applying the next for the cleanest finish.
Pabloskates Rating: ⭐⭐⭐⭐⭐ Workshop Essential
View on Amazon: https://amzn.to/4webJxS
Magic Eraser

What it does: A Magic Eraser is a melamine foam cleaning sponge that removes stubborn marks, scuffs and grime from plastic, vinyl and other hard surfaces without the need for harsh chemicals. It's particularly effective on white or light-coloured skate components.
Why I use it: Magic Erasers are brilliant for cleaning plastic outsoles, heels, toe caps and other areas that have picked up black marks or ground-in dirt over time. I often use one as part of the final clean before a restored pair of skates leaves the workshop. They can make old plastic components look noticeably fresher with very little effort.
Top Tip: Use the sponge slightly damp and apply only light pressure. Magic Erasers work by gently abrading the surface, so excessive rubbing can dull glossy finishes or remove printed graphics. Always test on an inconspicuous area first if you're unsure.
Pabloskates Rating: ⭐⭐⭐⭐☆ Worth Having
View on Amazon: https://amzn.to/3T5aoeg
Plastic Trim Restorer

What it does: Plastic trim restorer is designed to revive faded, weathered and dull plastic surfaces by restoring their original colour and finish. It's ideal for bringing black plastics back to life after years of use and exposure.
Why I use it: Hockey boots often have plastic heels, outsoles and trim that fade over time, making an otherwise well-restored pair of skates still look tired. Applying a quality plastic trim restorer can dramatically improve the overall appearance, giving faded components a deep, rich finish and helping the entire skate look newer. It's one of those finishing touches that really elevates a restoration.
Top Tip: Clean the plastic thoroughly before application and apply only a small amount using a microfibre cloth or applicator pad. Allow it to soak in before buffing away any excess. Avoid getting the product on wheels, bearings, toe stops or braking surfaces, as it can leave them slippery.
Pabloskates Rating: ⭐⭐⭐⭐☆ Worth Having
View on Amazon: https://amzn.to/4vBhCUC
Isopropyl Alcohol (IPA)

What it does: Isopropyl alcohol (IPA) is a fast-evaporating cleaning solution that removes grease, dirt, adhesive residue, oils and contaminants from a wide variety of surfaces. It leaves no residue behind, making it ideal for preparing parts before repairs or assembly.
Why I use it: IPA is one of the most frequently used products in the Pabloskates workshop. I use it to clean boot soles before re-gluing outer soles back on, remove old adhesive residue, degrease metal components and prepare surfaces before applying glue, dye or paint. It's an incredibly versatile product that deserves a place in any skate workshop.
Top Tip: Use a lint-free cloth and work in a well-ventilated area. While IPA is generally safe on most plastics and metals, always test it on an inconspicuous area before using it on painted or delicate surfaces. Keep it away from open flames, as it is highly flammable.
Pabloskates Rating: ⭐⭐⭐⭐⭐ Workshop Essential
View on Amazon: https://amzn.to/4ysj6TU
Microfibre Cloths

What it does: Microfibre cloths are soft, non-abrasive cleaning cloths that safely lift dust, dirt, grease and fingerprints without scratching delicate surfaces. They can be used dry for dusting or damp with cleaning products for more stubborn dirt.
Why I use it: Microfibre cloths are used throughout the Pabloskates workshop, from cleaning boots before restoration to buffing leather after applying dye and removing excess plastic trim restorer. They're also perfect for giving finished skates a final polish before photographing or packing them for dispatch. A good quality microfibre cloth is one of the simplest but most useful workshop essentials you can own.
Top Tip: Keep separate cloths for different jobs. I recommend having dedicated cloths for cleaning, applying dyes or restoration products, and final polishing. Wash them regularly without fabric conditioner, as conditioner can reduce their ability to absorb dirt and moisture.
Pabloskates Rating: ⭐⭐⭐⭐⭐ Workshop Essential
View on Amazon: https://amzn.to/4wOswrk
Workshop Essentials
A well-equipped workshop doesn't have to be filled with expensive specialist equipment. In fact, many of the tools I use most often are affordable, readily available and designed for completely different trades. Whether you're mounting plates, restoring old boots or simply carrying out routine maintenance, these workshop essentials can make the job quicker, easier and far more accurate.
The products in this section are tools that have earned a permanent place in the Pabloskates workshop. Some are used on virtually every pair of skates that comes through the door, while others only come out for specific jobs. If you're planning to build or restore your own skates, these are some of the first tools I'd recommend adding to your collection.
Digital Calipers

What it does: Digital calipers provide fast, accurate measurements down to fractions of a millimetre. They're ideal for measuring plate dimensions, wheel diameters, axle lengths, bearing sizes, bolt lengths and countless other components used in skate building and maintenance.
Why I use it: My digital calipers are probably one of the most frequently used tools in the Pabloskates workshop. Whether I'm designing 3D printed parts, checking plate measurements, confirming wheel sizes or ensuring mounting hardware is the correct length, they're invaluable for taking precise measurements. If you enjoy building or modifying skates, a good set of digital calipers will quickly become one of your favourite tools.
Top Tip: Buy a quality stainless steel set rather than the cheapest plastic version you can find. Accuracy and durability are well worth the small extra investment, especially if you'll be using them regularly. Remember to zero the calipers before every measurement to ensure the reading is accurate.
Pabloskates Rating: ⭐⭐⭐⭐⭐ Workshop Essential
View on Amazon: https://amzn.to/4fDWPem
Steel Rule

What it does: A steel rule provides a durable, accurate straight edge for measuring, marking and checking alignment. Unlike plastic rulers, it won't flex or wear easily, making it ideal for precision workshop tasks.
Why I use it: A steel rule is a simple but indispensable tool in the Pabloskates workshop. I use it for checking plate positioning, measuring wheelbase distances, marking drilling points and ensuring everything is aligned correctly before committing to a permanent modification. It's one of those tools that's constantly within arm's reach.
Top Tip: Choose a stainless steel rule with clearly etched metric graduations rather than printed markings, as they won't wear off over time. A cork-backed version is also worth considering, as it helps prevent the rule from slipping while marking out.
Pabloskates Rating: ⭐⭐⭐⭐⭐ Workshop Essential
View on Amazon: https://amzn.to/4wTV3fb
Engineer's Square

What it does: An engineer's square is a precision measuring tool used to check and mark perfect 90° angles. It's ideal for ensuring components are square, accurately transferring lines and checking alignment during workshop tasks.
Why I use it: Accuracy is everything when mounting roller skate plates. I use an engineer's square to help mark drilling positions, check plate alignment and ensure reference lines are perfectly perpendicular to the centreline of the boot. Even a small error can affect how a pair of skates feels, so this simple tool helps eliminate guesswork and improves consistency.
Top Tip: Buy a hardened stainless steel engineer's square rather than a plastic or woodworking square. A 100 mm (4") or 150 mm (6") square is the perfect size for most skate workshop jobs and is easy to store on the workbench.
Pabloskates Rating: ⭐⭐⭐⭐⭐ Workshop Essential
View on Amazon: https://amzn.to/4wShzVK
Masking Tape

What it does: Masking tape is a low-tack adhesive tape that protects surfaces while providing a convenient area for marking measurements, drilling positions and reference lines. It removes cleanly without leaving sticky residue on most materials.
Why I use it: I use masking tape on almost every skate build. Applying it to the sole of the boot allows me to mark centre lines, hole positions and measurements clearly without writing directly onto the boot itself. It also helps protect the boot from accidental scratches while drilling and can reduce the risk of the drill bit slipping when starting a hole.
Top Tip: Choose a good quality painter's masking tape rather than the cheapest option available. Better quality tape peels away cleanly, sticks more consistently and is less likely to tear or leave adhesive behind, especially if it's left in place for a few hours.
Pabloskates Rating: ⭐⭐⭐⭐⭐ Workshop Essential
View on Amazon: https://amzn.to/4pryGuL
Craft Knife

What it does: A craft knife is a precision cutting tool with a razor-sharp replaceable blade, perfect for making clean, accurate cuts in a wide range of materials including tape, card, foam, leather and thin plastics.
Why I use it: A craft knife is one of those tools that constantly gets picked up in the Pabloskates workshop. I use it for trimming masking tape, cutting templates, removing old adhesive, shaping carbon fibre reinforcement templates and carrying out countless other small jobs where accuracy is more important than brute force. It's a simple tool, but an incredibly useful one.
Top Tip: Always use a fresh, sharp blade. A dull blade requires more force, is harder to control and is actually more likely to slip than a sharp one. Keep plenty of spare blades on hand and always cut away from yourself using a suitable cutting mat.
Pabloskates Rating: ⭐⭐⭐⭐⭐ Workshop Essential
View on Amazon: https://amzn.to/4gOnx5f
Assorted File Set with Wire Brush

What it does: An assorted file set combines a selection of full-size hand files and precision needle files in a variety of shapes, such as flat, round, half-round, square and triangular. Most kits also include a wire brush for cleaning metal filings from the teeth, helping the files continue to cut efficiently and extending their lifespan.
Why I use it: If I could only recommend one set of files for skate restoration and workshop work, this would be it. The larger files are ideal for shaping plastic heels, smoothing mounting bolts, removing burrs and refining metal components, while the needle files are perfect for smaller, more intricate jobs where accuracy is essential. Between them, they cover almost every filing task I encounter in the Pabloskates workshop, making separate needle file sets largely unnecessary.
Top Tip: Let the file do the work. Apply steady pressure on the forward stroke and avoid dragging it backwards under pressure, as this dulls the teeth more quickly. Clean the file regularly with the supplied wire brush to prevent filings clogging the teeth, which helps maintain a smoother cut and prolongs the life of the tool.
Pabloskates Rating: ⭐⭐⭐⭐⭐ Workshop Essential
View on Amazon: https://amzn.to/4aYshkY
Rotary Tool

What it does: A rotary tool is a compact, high-speed power tool that accepts a wide range of interchangeable accessories for cutting, grinding, sanding, polishing, engraving and deburring. Its versatility makes it one of the most useful power tools for detailed workshop tasks.
Why I use it: My rotary tool regularly comes out for cleaning up drilled holes, removing burrs from mounting hardware, trimming small plastic components and polishing metal parts during skate restorations. With the right accessory fitted, it can save a huge amount of time compared to doing the same jobs by hand. It's not essential for every skater, but if you regularly build or restore skates, it's a tool you'll soon wonder how you managed without.
Top Tip: Invest in a quality rotary tool and use the correct accessory for the job. Running the tool too fast can melt plastics or generate excessive heat, while forcing the tool can quickly wear out cutting and grinding attachments. Let the speed of the tool do the work and always wear suitable eye protection.
Pabloskates Rating: ⭐⭐⭐⭐☆ Highly Recommended
View on Amazon: https://amzn.to/44DUBWb
Side Cutters

What it does: Side cutters are heavy-duty cutting pliers designed for cleanly cutting wire, cable ties, zip ties and softer metal components. They're a simple but incredibly versatile workshop tool that belongs in every toolbox.
Why I use it: I actually got mine free with my 3D printer but side cutters are used almost daily in the Pabloskates workshop. They're perfect for trimming 3d print supports, cable ties, cutting packaging, removing old rivets, snipping small metal clips and carrying out countless general workshop tasks. While they're not designed to cut hardened mounting bolts, they're one of those tools you'll find yourself reaching for time and time again.
Top Tip: Buy a good quality pair with hardened cutting jaws and comfortable handles. Avoid using them on materials they're not designed for, such as hardened steel bolts or thick wire, as this can damage the cutting edges. Keep them clean and lightly lubricated to ensure smooth operation.
Pabloskates Rating: ⭐⭐⭐⭐⭐ Workshop Essential
View on Amazon: https://amzn.to/4fmH2iG
Carpenter's Pincers

What they do: Carpenter's pincers are designed for gripping, twisting and pulling nails, but they also happen to be one of the best tools for removing rivets from ice hockey skates. Their rounded jaws allow you to grip the head of a rivet securely, making it much easier to extract without causing unnecessary damage to the boot or blade holder.
Why I use them: Every pair of hockey skates that comes into the Pabloskates workshop starts life with an ice blade attached, and that means removing a lot of rivets. Once the rivet head has been drilled away, a good pair of carpenter's pincers makes it quick and easy to pull out the remaining rivet body. They're also useful for removing stubborn nails, pulling staples and gripping awkward components around the workshop, making them a surprisingly versatile tool.
Top Tip: Don't try to pull intact rivets straight out. Drill the rivet head off first, then use the pincers to grip and remove the remaining shank. This requires far less force and greatly reduces the risk of damaging the boot or sole.
Pabloskates Rating: ⭐⭐⭐⭐⭐ Workshop Essential
View on Amazon: https://amzn.to/4vwwiVf
Pin Punch Set

What it does: A pin punch set is designed to drive out pins, rivets and other fasteners using a hammer. Available in a range of diameters, the different sized punches allow you to match the punch to the size of the rivet for controlled, accurate removal without damaging the surrounding material.
Why I use it: Not everyone has access to a dedicated rivet press, and that's where a pin punch set comes into its own. I use the correctly sized punch and a hammer to drive the rivet through the sole (from inside to outside). Combined with a car trim removal tool or carpenter's pincers, it's one of the simplest and most effective methods of removing blade holder rivets from ice hockey skates. It's an inexpensive tool that makes de-blading skates significantly easier.
Top Tip: Always choose a punch that's slightly smaller than the rivet you're removing. If the punch is too large, it can become wedged in the hole or damage the surrounding material. A few firm, controlled hammer blows are usually far more effective than repeated light taps.
Pabloskates Rating: ⭐⭐⭐⭐⭐ Workshop Essential
View on Amazon: https://amzn.to/44vYlZR
Car Trim Removal Tool

What it does: A car trim removal tool is designed to remove plastic clips and interior trim panels from vehicles without causing damage. Made from tough nylon, its forked shape also makes it an excellent tool for removing skate rivets by allowing you to lever underneath the rivet head evenly.
Why I use it: If you don't own a dedicated rivet press, this is one of the easiest and safest ways to remove rivets from ice hockey skates. Simply slide the fork underneath the rivet flange and use the tool to lever the remaining rivet out of the sole. It's particularly useful on the two front toe rivets, where there's often insufficient clearance to use a pin punch and hammer effectively. Because the force is spread over a much larger area than with a screwdriver, there's far less chance of marking or damaging the boot. It's become one of my favourite low-cost workshop tools and saves a huge amount of frustration when de-blading skates.
Top Tip: Use the trim removal tool alongside a pair of carpenter's pincers for particularly stubborn rivets. The trim tool can lift the rivet enough to get a secure grip with the pincers, making removal much easier without putting unnecessary stress on the boot.
Pabloskates Rating: ⭐⭐⭐⭐⭐ Workshop Essential
View on Amazon: https://amzn.to/4pnSDTc
Hammer Set

What it does: A hammer set provides a selection of hammer types and weights for different workshop tasks. Whether you're driving out rivets, seating components or carrying out light fabrication work, having the right hammer makes the job easier, safer and far more controlled.
Why I use it: A good hammer is used on almost every pair of skates that passes through the Pabloskates workshop. Whether I'm using a pin punch to drive out rivets, tapping components into place or carrying out general workshop jobs, having a choice of hammer sizes helps deliver the right amount of force without damaging the skate. A lighter hammer is ideal for delicate work, while a heavier one makes quick work of stubborn rivets and other seized components.
Top Tip: A small ball-pein hammer is particularly useful for skate work. Its compact size gives excellent control when using pin punches, while the rounded pein can also be useful for forming or adjusting small metal components. Avoid using an oversized hammer for delicate jobs, as accuracy is usually more important than brute force.
Pabloskates Rating: ⭐⭐⭐⭐⭐ Workshop Essential
View on Amazon: https://amzn.to/4vB5lzK
Screwdriver Set

What it does: A screwdriver set provides a range of flat-head, Phillips, Pozidriv, Torx and precision screwdrivers for assembling, adjusting and maintaining equipment. Having the correct screwdriver for the fastener helps prevent stripped screw heads and makes jobs quicker and easier.
Why I use it: Although most quad skates are assembled using nuts and bolts rather than screws, a good screwdriver set still gets plenty of use around the Pabloskates workshop. From dismantling equipment and adjusting tools to carrying out general workshop maintenance, it's one of those essentials that you'll reach for far more often than you might expect. A quality set also comes in handy when working on accessories, packaging equipment and the countless small jobs that crop up during a skate build.
Top Tip: Buy a set with magnetic tips and comfortable handles. Using the correct size and type of screwdriver is one of the easiest ways to avoid damaging screw heads, and magnetic tips make retrieving dropped screws much less frustrating.
Pabloskates Rating: ⭐⭐⭐⭐⭐ Workshop Essential
View on Amazon: https://amzn.to/3TGaokR
Hex Key Set

What it does: A hex key set, also known as Allen keys, is used to tighten and loosen hex socket bolts commonly found on roller skates, skate tools and workshop equipment. Available in both metric and imperial sizes, a comprehensive set ensures you always have the correct key for the job without risking damage to the bolt head.
Why I use it: Hex keys are used constantly in the Pabloskates workshop. They're essential for fitting and adjusting skate hardware, assembling workshop equipment, maintaining tools and working on many modern skate components. Having a complete set means I'm never searching for the right size, and using the correct key helps prevent rounded bolt heads that can be extremely difficult to remove.
Top Tip: Buy a set with long-arm keys and a ball-end design. The extra length provides better leverage, while the ball end allows you to tighten or loosen bolts at a slight angle, making it much easier to reach awkward fasteners in confined spaces.
Pabloskates Rating: ⭐⭐⭐⭐⭐ Workshop Essential
View on Amazon: https://amzn.to/4yqy5h5
Ratcheting Screwdriver

What it does: A ratcheting screwdriver works like a standard screwdriver but incorporates a ratcheting mechanism that allows you to tighten or loosen screws continuously without removing and repositioning the tool after each turn. Most sets also include a wide selection of interchangeable bits, making them suitable for a huge variety of workshop tasks.
Why I use it: Once you've used a ratcheting screwdriver, it's difficult to go back to a conventional one. The ratchet mechanism speeds up repetitive jobs, reduces hand fatigue and makes working in confined spaces much easier. Around the Pabloskates workshop it's used for maintaining equipment, assembling workshop fixtures, adjusting tools and tackling the countless small jobs that crop up every day. It's one of those tools that quickly becomes indispensable.
Top Tip: Choose a model with a fine-tooth ratchet mechanism and secure bit storage in the handle. A screwdriver that can switch instantly between tightening, loosening and locked modes will save time and make it much more versatile than a basic fixed screwdriver.
Pabloskates Rating: ⭐⭐⭐⭐⭐ Workshop Essential
View on Amazon: https://amzn.to/3QYL7Sj
Electric Screwdriver

What it does: An electric screwdriver uses a small rechargeable motor to drive screws and bolts with minimal effort. Compact, lightweight and often fitted with adjustable torque settings, it's ideal for repetitive assembly work where a full-size drill would be unnecessarily powerful.
Why I use it: An electric screwdriver is one of those tools you don't realise you need until you've used one. It's perfect for assembling workshop equipment, working on jigs, maintaining tools and tackling the many small jobs that don't justify getting the drill out. More importantly, it's been a real hand and wrist saver. Spending all day tightening or loosening plate mounting nuts by hand soon takes its toll, especially if you're building multiple pairs of skates or suffer from aching hands and wrists. The adjustable torque setting also makes it much less likely to overtighten fasteners or damage threads, making it ideal for precision work around the Pabloskates workshop.
Top Tip: Choose a model with adjustable torque settings, a built-in LED light and USB-C charging. The lower torque is usually more than sufficient for most workshop tasks, and finishing the final tightening by hand helps avoid damaging threads or overtightening delicate components.
Pabloskates Rating: ⭐⭐⭐⭐⭐ Highly Recommended
View on Amazon: https://amzn.to/4gDEzCV
Socket Set (Metric)

What it does: A metric socket set provides a range of sockets and a ratchet handle for quickly tightening and loosening nuts and bolts. Compared to using open-ended spanners, sockets offer better grip, greater leverage and are much less likely to damage fasteners.
Why I use it: A socket set is an essential part of any skate workshop. Whether you're building skates from scratch or carrying out routine maintenance, you'll be reaching for it constantly. An 8mm socket is used for tightening plate mounting nuts, 13mm is the standard size for most axle nuts, and 14mm is commonly used on kingpin nuts. Between those three sizes alone, you'll use a socket set on almost every pair of skates you work on. It's faster, more comfortable and far less frustrating than trying to do everything with adjustable spanners.
Top Tip: Buy a metric set that includes both shallow and deep sockets if possible. A small 1/4" drive socket set is ideal for skate work, as it's compact enough to reach into tight spaces while still providing plenty of torque for most maintenance jobs.
Pabloskates Rating: ⭐⭐⭐⭐⭐ Workshop Essential
View on Amazon: https://amzn.to/4f8g8wn
Threadlock

What it does: Threadlock is a liquid adhesive designed to prevent nuts and bolts from loosening due to vibration while still allowing them to be removed with normal hand tools. It's available in different strengths, with medium-strength (often blue) threadlock being the best choice for most skate applications.
Why I use it: Roller skates are subjected to constant vibration, impacts and repeated movement, all of which can gradually work fasteners loose over time. I use medium-strength threadlock on selected fasteners where appropriate to help keep everything securely in place without making future maintenance difficult. It's a simple product that can help prevent unexpected loosening and gives extra peace of mind.
Top Tip: A little goes a long way. Apply a small drop to clean, dry threads before assembly and allow it time to cure according to the manufacturer's instructions. Avoid using high-strength (permanent) threadlock unless there's a specific reason to do so, as it can make future disassembly unnecessarily difficult.
Pabloskates Rating: ⭐⭐⭐⭐⭐ Workshop Essential
View on Amazon: https://amzn.to/4ptaQPl
Magnetic Parts Tray

What it does: A magnetic parts tray is a simple but incredibly useful workshop accessory designed to securely hold nuts, bolts, bearings, washers, spacers and other small metal components. The strong magnetic base prevents parts from rolling away or getting lost while you're working.
Why I use it: There's nothing more frustrating than dropping a tiny spacer or mounting nut and watching it disappear across the workshop floor. A magnetic parts tray keeps everything organised and exactly where you need it while you're building or servicing skates. I use mine constantly when stripping down skates, changing bearings or assembling custom builds. It's one of those inexpensive purchases that quickly proves its worth.
Top Tip: Keep one tray for clean components and another for used or dirty parts during disassembly. If you're working on several pairs of skates at once, using separate trays can also help prevent parts from getting mixed up.
Pabloskates Rating: ⭐⭐⭐⭐⭐ Workshop Essential
View on Amazon: https://amzn.to/4bIk7gH
Head Torch

What it does: A head torch provides bright, hands-free illumination exactly where you're looking, making it much easier to work on detailed tasks in poorly lit areas. Most modern LED head torches offer adjustable brightness levels and rechargeable batteries for long-lasting performance.
Why I use it: Even in a well-lit workshop, it's easy for shadows to fall across the inside of a boot or underneath a skate plate. A head torch gives me a clear view when checking mounting holes, inspecting rivets, looking inside boots or carrying out detailed restoration work. Because the light moves with your head, both hands remain free to work, making fiddly jobs much easier and reducing eye strain.
Top Tip: Choose a rechargeable LED head torch with adjustable brightness and a wide beam setting. The brightest torch isn't always the best—having the option to reduce the brightness helps prevent glare when working on reflective surfaces or close-up detail.
Pabloskates Rating: ⭐⭐⭐⭐☆ Highly Recommended
View on Amazon: https://amzn.to/3RebTGn
Bench Vice

What it does: A bench vice securely clamps components in place, allowing you to drill, file, cut, grind and assemble parts safely and accurately. By holding the workpiece firmly, it improves both precision and safety while freeing up both hands to operate your tools.
Why I use it: A bench vice is one of the most valuable tools in the Pabloskates workshop. I use it for holding skate plates while cleaning or modifying them, securing bolts for cutting to length, gripping small components during restoration work and supporting various workshop jigs. Trying to carry out these jobs by hand is not only more difficult, but can also be far less safe.
Top Tip: Fit soft jaws or use pieces of wood, rubber or leather between the vice and delicate skate components to prevent scratching or damaging the finish. A 100 mm (4") or 125 mm (5") engineer's vice offers plenty of capacity for most skate workshop tasks without taking up excessive bench space.
Pabloskates Rating: ⭐⭐⭐⭐⭐ Workshop Essential
View on Amazon: https://amzn.to/3QYTOMr
Mounting & Assembly
Mounting a pair of roller skate plates is one of the most rewarding parts of a custom skate build, but it's also the stage where accuracy matters most. Careful measuring, marking and drilling can make the difference between a pair of skates that feel perfectly balanced and a pair that never quite feel right.
The tools in this section are the ones I regularly use when laying out plate positions, marking hole centres, drilling mounting holes and assembling skates. Many of them are inexpensive, but they make the entire process quicker, safer and far more accurate. Whether you're mounting your very first pair of skates or refining your workshop setup, these tools are well worth having close at hand.
Transfer Punch Set

What it does: A transfer punch set allows you to accurately transfer the position of existing holes onto another surface. Each punch is precision-ground to match a specific hole diameter, making it easy to mark drilling locations exactly where they need to be.
Why I use it: Transfer punches are incredibly useful when mounting skate plates. Once I'm happy with the plate position, I use the correct size punch to accurately mark the centre of each mounting hole before drilling. This is much quicker and more precise than trying to mark holes with a pen or pencil, helping to ensure the plate lines up exactly as intended.
Top Tip: Choose a comprehensive set covering a wide range of diameters so you'll always have a punch that closely matches the mounting holes in your skate plates. Hold the punch perfectly vertical and give it a light tap with a small hammer to create a clean centre mark without damaging the boot.
Pabloskates Rating: ⭐⭐⭐⭐⭐ Workshop Essential
View on Amazon: https://amzn.to/4aZH1jD
Automatic Centre Punch

What it does: A centre punch is used to create a small indentation in the surface of a material before drilling. This dimple guides the drill bit, helping to prevent it from wandering and ensuring the hole is drilled exactly where intended.
Why I use it: Accuracy is critical when mounting roller skate plates, and a centre punch plays an important role in achieving that. After marking the hole positions, I use a centre punch to create a positive starting point for the drill bit. This simple step greatly improves drilling accuracy, particularly when working with metal plates or hard plastic soles, and helps ensure every hole ends up exactly where it should.
Top Tip: A spring-loaded automatic centre punch is ideal for most skate workshop jobs as it doesn't require a hammer and can often be operated with one hand. Use just enough force to create a clear indentation without damaging the material beneath.
Pabloskates Rating: ⭐⭐⭐⭐⭐ Workshop Essential
View on Amazon: https://amzn.to/458aHaD
HSS Drill Bit Set

What it does: A quality drill bit set provides the various sizes needed for accurately drilling pilot holes, mounting holes and clearance holes in skate boots, plates, carbon fibre and other workshop materials. Having the correct drill bit for the job produces cleaner holes, reduces the risk of damage and makes drilling much easier.
Why I use it: Every custom skate build involves drilling, so a good drill bit set is absolutely essential in the Pabloskates workshop. I use different sizes depending on the mounting hardware and materials I'm working with, often starting with a small pilot hole before drilling to the final diameter. Sharp, high-quality drill bits produce cleaner, more accurate holes and significantly reduce the chance of the drill wandering or damaging the boot.
Top Tip: Invest in a quality HSS (High-Speed Steel) drill bit set and replace worn or damaged bits as they become dull. Always drill at the appropriate speed for the material and let the drill bit do the cutting rather than forcing it through. Using a pilot hole first will usually produce a much cleaner and more accurate result.
Pabloskates Rating: ⭐⭐⭐⭐⭐ Workshop Essential
View on Amazon: https://amzn.to/4x8Xmv1
Countersink Bit

What it does: A countersink bit creates a chamfered recess around a drilled hole, allowing countersunk screws to sit flush with the surface. It also removes sharp edges and burrs left behind after drilling, producing a cleaner, more professional finish.
Why I use it: Although most roller skate mounting bolts use pan-head screws rather than countersunk screws, a countersink bit is still an incredibly useful workshop tool. I regularly use one to deburr freshly drilled holes in skate plates and boot soles, removing sharp edges that could damage hardware or interfere with assembly. It only takes a quick twist to leave holes looking much cleaner and makes fitting components that little bit easier.
Top Tip: Use a light touch and remove only enough material to break the sharp edge. Running the countersink at a slower speed produces a cleaner finish and reduces the risk of chatter, especially when working with plastics and softer metals.
Pabloskates Rating: ⭐⭐⭐⭐☆ Highly Recommended
View on Amazon: https://amzn.to/455nCdw
Tap & Die Set

What it does: A tap and die set is used to cut new threads or repair damaged ones. Taps create internal threads in drilled holes, while dies cut or restore external threads on bolts and threaded rods. It's an invaluable tool for repairing damaged fasteners rather than replacing them.
Why I use it: Every now and then, a mounting bolt or threaded component arrives with damaged threads, often caused by cross-threading or accidental damage during installation. Rather than throwing perfectly good hardware away, a tap and die set can often restore the threads in just a few minutes. It's also useful for cleaning threads that have become clogged with paint, dirt or corrosion. While it's not a tool I use every day, when I need it, nothing else will do the job.
Top Tip: Buy a quality tap and die set made from hardened steel rather than the cheapest available option. Always use a suitable cutting lubricant when cutting new threads, work slowly and back the tap or die off every few turns to break the swarf and reduce the risk of damaging the threads. A lot of skate hardware is American which means threads will be in inches (imperial). Mounting bolts are usually metric (M5) so you will need a mixture of both imperial and metric sets. Common imperial thread sizes used on skates are; Standard Toe Stops = 5/16-18UNC,
Adjustable Toe Stops = 5/8-18UNF, Truck Axles = 5/16 NF24.
Pabloskates Rating: ⭐⭐⭐⭐☆ Highly Recommended
View on Amazon: https://amzn.to/4yncXIN
Bolt Cutting Jig Components
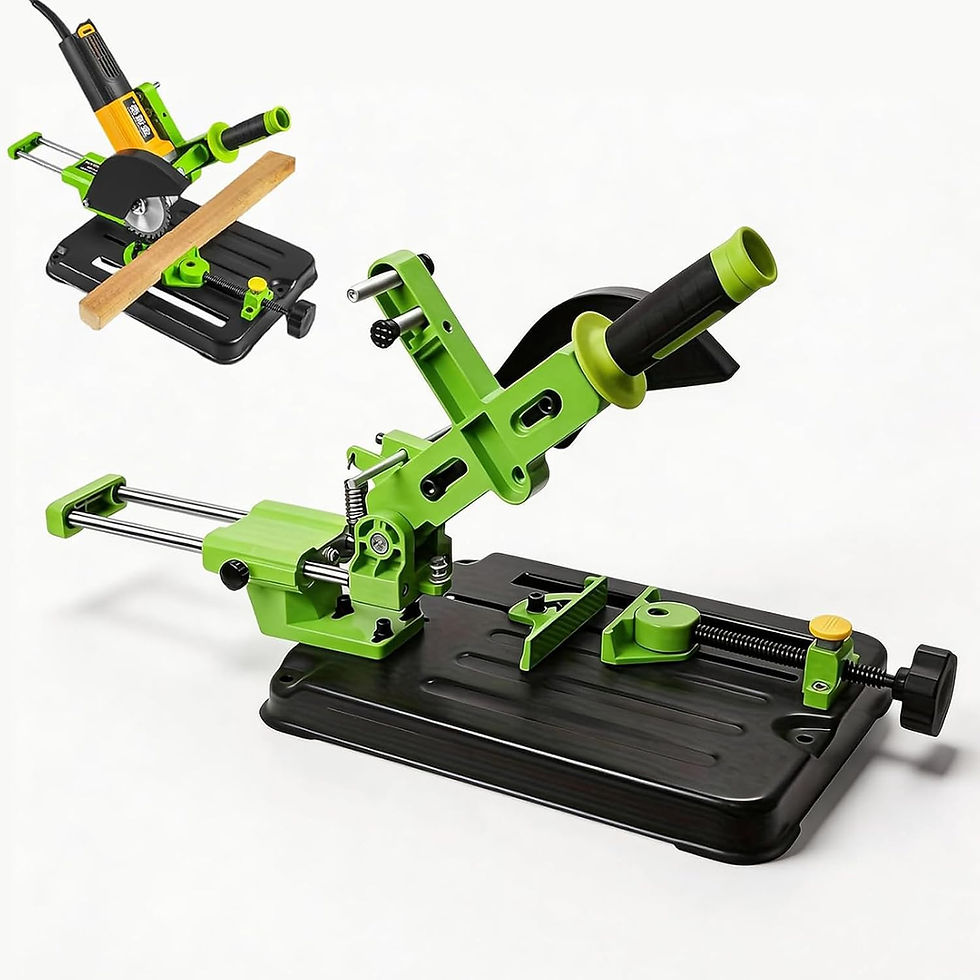
What it does: A bolt cutting jig allows mounting bolts to be cut quickly, accurately and repeatedly to exactly the same length. Built using readily available workshop components, it transforms an angle grinder into a precise cutting station, producing clean, consistent cuts in a fraction of the time it would take by hand.
Why I use it: After cutting hundreds of mounting bolts individually with hand tools, I built my own bolt cutting jig to speed up the process and improve consistency. It allows me to produce accurately sized mounting bolts with clean threads, reducing the amount of filing and thread cleaning required afterwards. It's one of those workshop projects that has paid for itself many times over and has become an essential part of the Pabloskates workshop.
Top Tip: If you're planning to build your own jig, prioritise accuracy and safety. Make sure every component is securely mounted and always wear appropriate eye and hearing protection when using an angle grinder. A simple jig can dramatically improve repeatability, but only if it's built and used correctly. Please note that this is the holder only. You'll need to supply your own angle grinder separately. The holder is designed as a universal fit and is compatible with most angle grinders, but always check compatibility with your particular model before purchasing.
Pabloskates Rating: ⭐⭐⭐⭐⭐ Workshop Essential
View on Amazon: https://amzn.to/4vBItzU
Digital Angle Gauge

What it does: A digital angle gauge is a precision measuring tool that accurately measures and sets angles, typically to within 0.1°. Compact and easy to use, it attaches magnetically to metal surfaces, making it ideal for setting up machinery and checking angles with confidence.
Why I use it: Although it's not something I use on every skate build, a digital angle gauge is incredibly useful when setting up workshop equipment and jigs. I've used mine when building workshop tools, aligning machinery and checking that fixtures are perfectly square or set to the correct angle. If you enjoy making your own workshop equipment or regularly fabricate parts, it's a surprisingly handy tool to have available.
Top Tip: Before taking any measurements, always zero the gauge against a known flat reference surface. Choose a model with a magnetic base and a backlit display, as these features make it much easier to use around workshop machinery and in areas with limited lighting.
Pabloskates Rating: ⭐⭐⭐⭐☆ Worth Having
View on Amazon: https://amzn.to/4fFu6pr
Cleaning Products
Keeping your skates clean isn't just about appearance. Dirt, grease and built-up grime can hide damage, shorten the life of materials and make routine maintenance more difficult. A few inexpensive cleaning products can dramatically improve the look of your skates while helping to preserve them for years to come.
The products in this section are the ones I regularly use to clean boots before restoration, prepare surfaces for repairs and give finished skates a professional final presentation. Most are inexpensive, readily available and suitable for both routine maintenance and full restorations.
Shoe Cleaner - Crep Protect Cleaner Kit

What it does: Crep Protect Cure is a premium shoe cleaning kit designed to safely remove dirt, grime and everyday marks from leather, synthetic materials, canvas, rubber and many other surfaces. Supplied with a specialist cleaning solution, brush and microfibre cloth, it's suitable for everything from routine cleaning to preparing skates for restoration.
Why I use it: This is my go-to cleaner in the Pabloskates workshop. I use Crep Protect Cure on virtually every pair of skates before carrying out restoration work or photographing them for sale. It does an excellent job of lifting dirt without being overly aggressive, making it suitable for both modern and vintage hockey boots. Starting with a thoroughly cleaned pair of boots also makes it much easier to identify any areas that need further attention.
Top Tip: Remove the laces before cleaning and use small circular motions rather than scrubbing aggressively. A little cleaning solution goes a long way, so there's no need to soak the boot. Allow the skates to dry naturally before applying conditioners, dyes or other restoration products.
Pabloskates Rating: ⭐⭐⭐⭐⭐ Workshop Essential
View on Amazon: https://amzn.to/4bQKlxF
Leather Conditioner
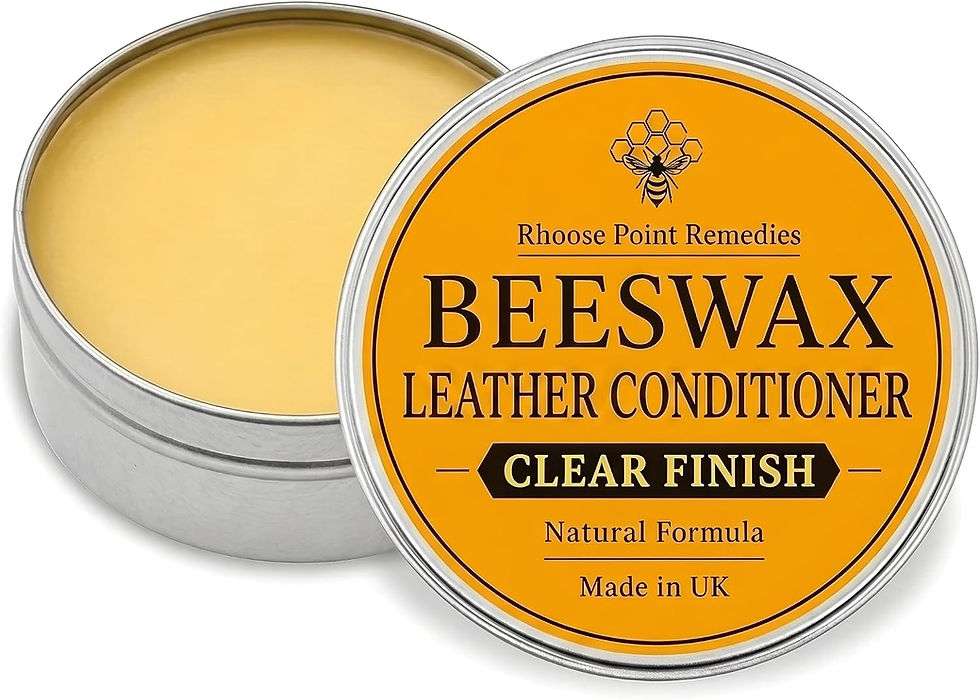
What it does: Leather conditioner nourishes and moisturises leather, helping to prevent it from drying out, cracking and becoming brittle over time. It also restores suppleness, enhances the appearance of the leather and provides a degree of protection against everyday wear.
Why I use it: Many of the vintage hockey boots I convert into quad roller skates have spent years in lofts, garages or cupboards before arriving at the workshop. Their leather is often dry and lacking its original flexibility. After thoroughly cleaning the boots, applying a quality leather conditioner helps restore moisture and improve the overall appearance. It's an important finishing step that not only makes the boots look better but also helps preserve them for years to come.
Top Tip: Always clean the leather before applying conditioner. Use a soft microfibre cloth to apply a thin, even coat and allow it to soak in naturally before buffing away any excess. Applying too much conditioner can leave the leather feeling greasy, so several light applications are better than one heavy coat.
Pabloskates Rating: ⭐⭐⭐⭐⭐ Highly Recommended
View on Amazon: https://amzn.to/4b0rbFk
White Vinegar

What it does: White vinegar is a mild acidic cleaner that's excellent at cutting through dirt, grime, grease and light mineral deposits. It's inexpensive, widely available and particularly effective for cleaning plastic skate boots that have picked up years of general workshop dirt.
Why I use it: White vinegar has become one of my go-to cleaners for restoring white and coloured plastic skates. It does an excellent job of removing stubborn grime without resorting to harsh chemicals, making Bauer X-LP, X-LS and similar plastic boots look noticeably fresher. It's especially useful as a first cleaning stage before using a Magic Eraser or applying a plastic trim restorer.
Top Tip: Never leave vinegar sitting on metal components for extended periods. Although it's a mild acid, prolonged contact can encourage corrosion. If you're cleaning skates with plates, bearings or other metal hardware still fitted, use it sparingly and always wipe everything completely dry afterwards. Applying a little water-displacing spray to exposed metal afterwards is also good practice.
Pabloskates Rating: ⭐⭐⭐⭐☆ Worth Having
View on Amazon: https://amzn.to/4ytZ5wd
Shoe Deodorant

What it does: Shoe deodorant helps eliminate unpleasant odours caused by sweat, bacteria and moisture inside your skates. Available as sprays, powders or odour-absorbing pouches, it's a quick and easy way to keep your boots smelling fresh between skating sessions.
Why I use it: Whether you've bought a pair of second-hand hockey boots or have been skating hard for a few hours, skates can quickly develop an unpleasant smell. A good shoe deodorant helps neutralise odours before they become embedded in the lining, making your skates much nicer to wear and store. It's particularly useful if you skate several times a week or keep your skates in the car between sessions. Every pair of skates that leaves the Pabloskates workshop is given a final spray before it's packed, so customers receive boots that not only look clean but smell fresh too.
Top Tip: Deodorant is only part of the solution. After every skate, loosen the laces, open the boots up and allow them to air dry naturally before storing them. Trapping damp skates straight into a bag is one of the quickest ways to create bad smells.
Pabloskates Rating: ⭐⭐⭐⭐☆ Worth Having
View on Amazon: https://amzn.to/4fk5tNX
Anti-Fungal Spray

What it does: Anti-fungal spray is designed to help prevent the growth of fungi and bacteria that can thrive inside warm, damp footwear. Regular use helps keep skates hygienic, reduces unpleasant odours and can lower the risk of common fungal infections such as athlete's foot.
Why I use it: Roller skates inevitably get warm and sweaty inside, especially after long skating sessions. If that moisture isn't dealt with, it creates the perfect environment for fungi and bacteria to multiply. I recommend using an anti-fungal spray regularly, particularly if you skate several times a week or share skates with other people. It's also a sensible addition when buying second-hand boots, giving them a hygienic fresh start before you lace them up. Every pair of skates that leaves the Pabloskates workshop is given a quick blast before it's packed, so customers receive boots that are not only clean but hygienic too.
Top Tip: Spray the inside of your skates after they've had time to dry, not while they're still soaking wet. Allow the spray to dry completely before wearing them again, and remember that good ventilation is just as important as any anti-fungal product.
Pabloskates Rating: ⭐⭐⭐⭐☆ Worth Having
View on Amazon: https://amzn.to/3TGZ9so
Distilled Water

What it does: Distilled water is purified water with virtually all minerals and impurities removed. Unlike ordinary tap water, it leaves no mineral deposits behind and significantly reduces the risk of corrosion when cleaning metal components.
Why I use it: Distilled water is something I always keep in the workshop for cleaning bearings and other metal skate parts. Mixed with a small amount of washing-up liquid, it makes an excellent cleaner for removing dirt, grease and old lubricant. Unlike ordinary tap water, it doesn't contain the minerals that can encourage rust or leave deposits behind as it dries. It's a simple, inexpensive upgrade that helps protect your skate components.
Top Tip: Distilled water doesn't make metal rust-proof. Bearings, axles and other steel components should still be dried thoroughly as soon as they're cleaned and then lubricated before being put back into service. Never leave metal parts soaking or allow them to air dry naturally.
Pabloskates Rating: ⭐⭐⭐⭐☆ Worth Having
View on Amazon: https://amzn.to/4b1zLDH
Washing-Up Liquid (Dish Soap)

What it does: Washing-up liquid is a mild but highly effective degreaser that cuts through dirt, old grease and grime without damaging most skate components. It's one of the simplest and cheapest cleaning products you'll ever buy, yet one of the most useful.
Why I use it: Washing-up liquid is my go-to cleaner for many workshop jobs. Mixed with distilled water, it's ideal for cleaning bearings, axles, mounting hardware and other metal components before they're dried and lubricated. It's also excellent for giving boots, wheels and plastic parts a thorough clean before moving on to more specialised restoration products. For something that costs very little, it's surprisingly versatile and earns its place in every skate workshop.
Top Tip: A little goes a long way. You only need a few drops mixed with distilled water to make an effective cleaning solution. After cleaning any metal parts, dry them thoroughly and lubricate them before reassembly to help prevent corrosion.
Pabloskates Rating: ⭐⭐⭐⭐⭐ Workshop Essential
View on Amazon: https://amzn.to/4bLXrMA
Acetone

What it does: Acetone is a powerful solvent that quickly dissolves adhesives, paint, permanent marker, sticker residue and other stubborn contaminants that ordinary cleaners struggle to remove. Used correctly, it can dramatically speed up restoration work.
Why I use it: Acetone is one of those products I only reach for when nothing else will do. It's excellent for removing old decals, adhesive residue, paint transfer and years of stubborn grime from skate components. In the Pabloskates workshop, it's occasionally used during restorations where a clean surface is needed before repainting or refinishing. It's incredibly effective, but it's definitely a product that demands respect.
Top Tip: Use acetone very sparingly and always test it on an inconspicuous area first. It can permanently damage or even melt certain plastics, soften painted finishes and remove printed graphics in seconds. Apply it with a cloth or cotton bud rather than pouring it directly onto the skate, and wipe it away as soon as the contamination has been removed. When in doubt, don't use it.
Pabloskates Rating: ⭐⭐⭐⭐☆ Specialist Workshop Tool
View on Amazon: https://amzn.to/4vH6Xb7
Soft Detailing Brushes

What it does: Soft detailing brushes are designed to gently remove dust, dirt and grime from hard-to-reach areas without scratching delicate surfaces. Their soft bristles make them ideal for cleaning around eyelets, stitching, wheel hubs, plates, toe stops and other intricate parts of a roller skate.
Why I use it: A detailing brush is one of those inexpensive tools that makes a noticeable difference during a restoration. I use them to clean around rivets, inside wheel spokes, around plate edges and anywhere a cloth simply can't reach. They're also excellent for dusting skates before photographing them, ensuring they look their absolute best without risking damage to the finish.
Top Tip: Buy a set with a range of brush sizes and keep separate brushes for different jobs. I have dedicated brushes for general cleaning and others for applying cleaning products, helping to avoid cross-contamination and ensuring every pair of skates receives the best possible finish.
Pabloskates Rating: ⭐⭐⭐⭐⭐ Workshop Essential
View on Amazon: https://amzn.to/3RjvO6A
Compressed Air

What it does: Compressed air is ideal for blowing dust, dirt and loose debris out of hard-to-reach areas without taking components apart. It's particularly useful for cleaning around bearings, wheel hubs, eyelets, stitching and other places where brushes and cloths struggle to reach.
Why I use it: I use compressed air as part of the final cleaning process before a pair of skates leaves the Pabloskates workshop. It's excellent for removing dust created during drilling or sanding and for blowing debris out of tight spaces before taking product photographs. It's also handy for cleaning workbenches, tools and workshop equipment, helping to keep everything looking tidy and preventing dust from transferring back onto freshly restored skates.
Top Tip: Hold the can upright while spraying and use short bursts rather than prolonged blasts. Avoid directing compressed air straight into sealed bearings, as it can force dirt further inside or displace lubricant. If you're cleaning bearings, it's better to remove and service them properly rather than relying on compressed air alone.
Pabloskates Rating: ⭐⭐⭐⭐☆ Worth Having
View on Amazon: https://amzn.to/4vys2nS
Photography & Content Creation
Whether you're selling skates online, sharing your latest build on social media or simply documenting your restoration projects, good photography can make all the difference. You don't need an expensive camera or professional studio to produce great-looking images just a few affordable accessories that improve lighting, stability and presentation.
The products in this section are aimed at anyone who enjoys showcasing their work, whether you're selling the occasional pair of skates or running a workshop like Pabloskates. Clear, well-lit photographs not only look more professional but also help highlight the quality and attention to detail that has gone into every build.
LED Work Light

What it does: An LED work light provides bright, even illumination that makes it much easier to see fine details while working on roller skates. Unlike traditional bulbs, LED lights produce very little heat, consume less power and offer a daylight-like colour temperature that's ideal for both workshop tasks and photography.
Why I use it: Good lighting is one of the best investments you can make in any workshop. I use LED work lights throughout the Pabloskates workshop when mounting plates, inspecting restorations, photographing finished skates and filming videos for social media. Bright, shadow-free lighting not only makes detailed work easier, but also helps identify scratches, dirt and imperfections that might otherwise go unnoticed.
Top Tip: Choose an LED work light with adjustable brightness and a daylight colour temperature (around 5000K–6500K). Positioning two lights at different angles will reduce harsh shadows and produce much better photographs than relying on a single light source.
Pabloskates Rating: ⭐⭐⭐⭐⭐ Workshop Essential
View on Amazon: https://amzn.to/4bQMNnR
LED Light Box for Product Images

What it does: An LED light box is a portable photography studio designed to produce clean, evenly lit product photographs with minimal shadows. It typically includes built-in LED lighting and interchangeable background colours, making it ideal for photographing skates, components and accessories for online listings.
Why I use it: When selling skate parts and accessories, presentation matters. An LED light box allows me to take consistent, professional-looking product photos regardless of the weather or time of day. The even lighting helps capture accurate colours and fine details, while the clean background keeps the focus firmly on the product. It's particularly useful for smaller items such as bearings, toe stops, wheels, cushions and mounting hardware.
Top Tip: Buy the largest light box your workspace and budget allow. Even if you're mainly photographing small accessories today, a larger light box gives you the flexibility to photograph bigger products in the future. Choose one with adjustable LED brightness and multiple background colours to suit different products.
Pabloskates Rating: ⭐⭐⭐⭐⭐ Highly Recommended
View on Amazon: https://amzn.to/4yt47sU
Phone Tripod / Selfie Stick

What it does: A phone tripod provides a stable platform for your smartphone, allowing you to capture sharp photographs and smooth, shake-free videos. Most include adjustable legs and a ball head, making it easy to position your phone at almost any angle.
Why I use it: Almost all of the content I create for Pabloskates is filmed on a smartphone. A tripod lets me record skate builds, restorations and workshop tips without worrying about camera shake or constantly repositioning the phone. It's also invaluable for taking consistent product photos and filming myself while both hands are occupied working on a pair of skates.
Top Tip: Choose a tripod with a Bluetooth remote or one that allows you to use your phone's timer. Being able to start recording or take a photo without touching the phone helps eliminate movement and makes filming on your own much easier.
Pabloskates Rating: ⭐⭐⭐⭐⭐ Workshop Essential
View on Amazon: https://amzn.to/4hguiN9
LED Ring Light

What it does: An LED ring light provides soft, even illumination that reduces harsh shadows and creates flattering, consistent lighting for photographs and videos. Designed to surround the camera lens, it produces an attractive catchlight while helping products and presenters appear brighter and more evenly lit.
Why I use it: Good lighting can make the difference between content that looks amateur and content that looks professional. I use a ring light when filming workshop tutorials, product demonstrations and talking-to-camera videos, especially during darker evenings when natural light isn't available. It's also useful for photographing smaller skate parts, helping to reveal details and colours more accurately without creating harsh shadows.
Top Tip: Choose a ring light with adjustable brightness and colour temperature. Matching the lighting to your surroundings will produce more natural-looking results and make editing much easier. If you're filming with a smartphone, look for a model that includes a built-in phone holder and adjustable tripod.
Pabloskates Rating: ⭐⭐⭐⭐☆ Worth Having
View on Amazon: https://amzn.to/44wTQhJ
Wearable Bluetooth Microphone

What it does: A wearable Bluetooth microphone captures clear, high-quality audio while allowing you to move freely. Most clip onto your clothing and transmit wirelessly to your smartphone or camera, dramatically reducing background noise and improving voice clarity compared to using a device's built-in microphone.
Why I use it: Audio quality is often overlooked, but it's one of the biggest factors that separates professional-looking content from amateur videos. In the workshop I'm often standing several feet away from the camera, using noisy tools or moving around while explaining a process. A wireless microphone ensures my voice stays clear and easy to understand without having to shout or constantly move closer to the camera. It makes tutorials, product reviews and workshop updates far more enjoyable to watch.
Top Tip: Choose a microphone with built-in noise reduction and a windscreen (often called a deadcat) if you film outdoors. Also look for a model that allows you to charge while recording or includes a charging case, as running out of battery halfway through filming is incredibly frustrating.
Pabloskates Rating: ⭐⭐⭐⭐⭐ Highly Recommended
View on Amazon: https://amzn.to/44BeblT
Mini Turntable

What it does: A mini rotating turntable allows you to smoothly rotate products while photographing or filming them. It's ideal for creating professional 360° product videos, giving viewers a clear view from every angle without needing to handle the item during filming.
Why I use it: A rotating turntable is a simple but effective way to make product videos look far more professional. I use one to showcase completed skate builds, wheels, plates and accessories on social media and product listings. A smooth rotating shot highlights details that static photographs can miss and gives customers a much better feel for the product before they buy.
Top Tip: Choose a motorised turntable with adjustable rotation speeds and a quiet motor. A larger diameter platform also makes it easier to display complete roller skates without them overhanging the edge, resulting in cleaner, more balanced footage.
Pabloskates Rating: ⭐⭐⭐⭐☆ Worth Having
View on Amazon: https://amzn.to/4wFTT6A
White Background Roll

What it does: A white background roll provides a clean, seamless backdrop for photographing products. It eliminates distracting backgrounds and helps produce bright, professional-looking images that are ideal for online shops, marketplaces and social media.
Why I use it: Consistency is key when selling products online. A white background keeps the attention firmly on the skates or accessories rather than what's sitting on the workbench behind them. It also makes editing much easier and gives product listings a cleaner, more professional appearance. Whether I'm photographing a complete pair of custom skates or a small set of bearings, a seamless white backdrop helps present them at their best.
Top Tip: Position your background so it curves gently from the vertical to the horizontal, creating what's known as an "infinity curve". This removes the visible corner where the wall meets the surface, giving your photos a smooth, seamless background without distracting lines.
Pabloskates Rating: ⭐⭐⭐⭐☆ Worth Having
View on Amazon: https://amzn.to/4vBlLbg
Auto-Stabilising Gimbal

What it does: An auto-stabilising gimbal uses electronic motors to keep your smartphone level while filming, producing incredibly smooth, cinematic footage even when you're walking or moving around. Most models also include useful features such as subject tracking, panorama modes and programmable camera movements.
Why I use it: Roller skating videos are far more engaging when the camera movement is smooth and controlled. Whether I'm filming customers skating in their new builds, recording workshop tours or creating product showcases, a gimbal instantly makes footage look more professional. It also makes filming one-handed much easier, allowing me to move naturally without the distracting shakes that often come from handheld smartphone footage.
Top Tip: If you regularly film yourself, choose a gimbal with AI subject tracking or your phone's built-in tracking support. Being able to walk around the workshop while the camera automatically follows you can transform the quality of solo content creation.
Pabloskates Rating: ⭐⭐⭐⭐☆ Worth Having
View on Amazon: https://amzn.to/44BYBX9
Action Camera (GoPro Style)

What it does: An action camera is a compact, rugged video camera designed to capture smooth, high-quality footage in demanding environments. With wide-angle lenses, image stabilisation and high frame rate recording, they're perfect for filming skating sessions, workshop projects and behind-the-scenes content.
Why I use it: An action camera gives viewing angles that simply aren't practical with a phone. Whether it's mounted to a helmet, chest harness, tripod or clamped to the workbench, it captures immersive footage that puts viewers right in the middle of the action. They're brilliant for filming skate sessions, build time-lapses, workshop tutorials and product demonstrations while keeping both hands free to work.
Top Tip: Record at the highest resolution and frame rate your camera supports, even if your final video will be uploaded in 1080p. The extra resolution gives you far more flexibility when cropping, stabilising or creating vertical videos for TikTok, Instagram Reels and YouTube Shorts without sacrificing image quality.
Pabloskates Rating: ⭐⭐⭐⭐⭐ Highly Recommended
View on Amazon: https://amzn.to/4fGRFOJ
360° Action Camera (Insta360 Style)

What it does: A 360° action camera records everything around it simultaneously using dual ultra-wide-angle lenses. After filming, you can choose any viewing angle during editing, creating smooth, dynamic videos without needing to point the camera while recording.
Why I use it: If you're creating skating content, a 360° camera is one of the most versatile tools you can own. Instead of worrying about keeping yourself or the action in frame, you simply press record and skate. Afterwards, you can pan, zoom and reframe the footage to follow the action from almost any angle. It's ideal for filming skating sessions, tutorials, customer showcases and social media content, especially when you're working on your own. It also opens up creative possibilities that simply aren't possible with a traditional action camera.
Top Tip: Mount the camera on an invisible selfie stick. Most 360° cameras automatically remove the stick from the final footage, creating the illusion that the camera is floating alongside you. It's one of the easiest ways to produce professional-looking videos with minimal equipment.
Pabloskates Rating: ⭐⭐⭐⭐⭐ Highly Recommended
View on Amazon: https://amzn.to/4w5419f
Safety Equipment
No workshop is complete without proper safety equipment. Whether you're drilling mounting holes, cutting bolts, sanding components or working with adhesives, protecting yourself should always come before finishing the job a little quicker.
Fortunately, staying safe doesn't require expensive specialist gear. A handful of well-chosen items can significantly reduce the risk of injury while making your workshop a more comfortable place to work. The products in this section are the safety equipment I recommend for anyone building, restoring or maintaining roller skates at home. Even if you're only carrying out occasional repairs, they're well worth having within easy reach.
Safety Glasses

What they do: Safety glasses protect your eyes from flying debris, dust, metal swarf and other hazards commonly produced when drilling, grinding, sanding or cutting. Most modern designs use impact-resistant polycarbonate lenses while remaining lightweight and comfortable enough to wear for extended periods.
Why I use them: Whether I'm drilling mounting holes, trimming bolts, using a rotary tool or removing old rivets, safety glasses are always one of the first things I put on. It only takes a split second for a metal shaving or piece of plastic to become airborne, and eye injuries can be life-changing. They're a simple, inexpensive piece of kit that no workshop should be without.
Top Tip: Buy glasses with anti-fog, scratch-resistant lenses and keep a spare pair in the workshop. If you normally wear prescription glasses, either choose safety glasses designed to fit over them or invest in prescription safety eyewear for all-day comfort.
Pabloskates Rating: ⭐⭐⭐⭐⭐ Workshop Essential
View on Amazon: https://amzn.to/4wSa2WX
Ear Protection

What it does: Ear protection helps reduce exposure to loud workshop noise, protecting your hearing when using power tools such as drills, angle grinders, rotary tools and belt sanders. Whether you choose traditional ear defenders or reusable ear plugs, both can significantly reduce noise levels while allowing you to work more comfortably.
Why I use it: Some workshop jobs are surprisingly loud, especially when cutting mounting bolts, grinding metal or using power tools for extended periods. While a few minutes of noise might not seem like much, repeated exposure over months and years can cause permanent hearing damage. Good ear protection allows me to concentrate on the job without the fatigue that constant loud noise can cause.
Top Tip: Choose hearing protection that's comfortable enough to wear for long periods. If you regularly switch between noisy and quieter tasks, electronic ear defenders that reduce harmful noise while still allowing conversations can be a worthwhile upgrade.
Pabloskates Rating: ⭐⭐⭐⭐⭐ Workshop Essential
View on Amazon: https://amzn.to/4hoHaAO
Dust Mask / Respirator

What it does: A dust mask or respirator helps protect your lungs from airborne dust, fine particles and fumes generated during workshop tasks. While a simple disposable mask is suitable for light dust, a reusable respirator with replaceable filters provides a much higher level of protection when sanding, grinding, spraying or working with adhesives and solvents.
Why I use it: Skate restoration often creates fine dust from old leather, plastics, rubber and carbon fibre, particularly when drilling, sanding or shaping components. Some cleaning products and adhesives can also produce fumes that aren't pleasant to breathe. Wearing the correct respiratory protection is a simple precaution that helps keep your lungs healthy, especially if you spend long hours in the workshop.
Top Tip: Match the mask to the job. An FFP2 or FFP3 mask is ideal for dusty tasks, while a reusable respirator fitted with the appropriate particulate or vapour filters offers better protection when working with paints, solvents or adhesives. Whatever you choose, make sure it fits properly around your face, as even the best respirator won't protect you if it doesn't seal correctly.
Pabloskates Rating: ⭐⭐⭐⭐⭐ Workshop Essential
View on Amazon: https://amzn.to/4fkXFv4
Cut-Resistant Gloves

What they do: Cut-resistant gloves help protect your hands from sharp edges, blades and metal components while still allowing enough dexterity to carry out detailed workshop tasks. Made from high-strength fibres, they significantly reduce the risk of cuts without feeling overly bulky.
Why I use them: Roller skate restoration involves handling plenty of sharp objects, from freshly cut mounting bolts and metal plates to craft knives and rotary tool accessories. While no glove is completely cut-proof, a good pair of cut-resistant gloves provides valuable protection during higher-risk jobs. They can turn what might have been a serious cut into nothing more than a close call.
Top Tip: Choose gloves that offer a good balance between protection and dexterity. Very thick gloves can make precision work more difficult, so I tend to wear cut-resistant gloves for tasks involving sharp materials and switch to bare hands when carrying out delicate assembly work where maximum feel is needed.
Pabloskates Rating: ⭐⭐⭐⭐☆ Worth Having
View on Amazon: https://amzn.to/4fodSjo
Frequently Asked Questions
Do I need specialist skate tools?
Not necessarily. Many of the tools I use every day in the Pabloskates workshop are standard workshop tools that are readily available online or from your local hardware shop. Good measuring tools, quality drill bits and a few carefully chosen accessories will get you much further than buying expensive skate-specific equipment.
Can I restore old hockey boots?
Absolutely. In fact, restoring vintage hockey boots is one of my favourite parts of the job. Many older Bauer and Nike boots were built to an exceptionally high standard and can often be brought back to life with a thorough clean, fresh laces, new wheels and a little cosmetic restoration. With the right care, boots that look ready for the bin can often become stunning custom quad skates.
What's the best way to clean white skate boots?
Start with a dedicated shoe cleaner and a soft detailing brush to remove surface dirt without damaging the material. For stubborn marks, a Magic Eraser can work wonders on white plastics and rubber, while a white paint pen is excellent for restoring worn logos and small scuffs. Always test cleaning products on a hidden area first and allow the boots to dry completely before applying any dyes, conditioners or protectants.
Which tools do I use most often?
If I had to choose just a handful, they'd be digital calipers, a steel rule, engineer's square, transfer punches, quality drill bits, masking tape, a rotary tool and a good LED work light. These are the tools that come out for almost every skate build and make a huge difference to both accuracy and efficiency.
Are these the exact products used by Pabloskates?
In many cases, yes. Many of the products featured in this guide are the same ones I use regularly in the Pabloskates workshop. In other cases, I've recommended products that are very similar because exact models are sometimes discontinued or replaced by newer versions. I only recommend products that I genuinely believe offer good value and would be happy to use myself. If I wouldn't spend my own money on it, it won't appear in this guide.
Are expensive tools worth buying?
Not always. It's usually worth spending more on tools that affect accuracy, such as calipers, drill bits and measuring equipment, because you'll use them on almost every project. Other items, such as brushes, masking tape or parts trays, can be inexpensive without affecting the quality of your work.
Can I mount roller skate plates at home?
Yes, provided you have the right tools, take accurate measurements and are prepared to work carefully. Mounting skates isn't especially difficult, but accuracy is critical. Measure everything twice before drilling, as there's no easy way to undo misplaced holes.
What's the most useful tool for a beginner?
If you're only buying one tool, I'd recommend a quality digital caliper. Accurate measurements are essential when selecting plates, positioning axles and checking hardware. It's a tool you'll use on almost every project.
Do I need a workshop to restore skates?
No. Many skate restorations can be completed on a sturdy table or workbench at home. Good lighting, a clean workspace and a few basic hand tools are often far more important than having a dedicated workshop.
Are Amazon tools good enough?
Many of them are. Some of the tools I use every week came from Amazon and have proved to be excellent value. As with anything, it's worth reading reviews and avoiding the very cheapest options, particularly for tools where precision matters.
What's the biggest mistake beginners make?
Usually rushing. Whether you're cleaning old boots or mounting new plates, taking your time almost always produces better results. Double-check your measurements, use the correct tools and don't be afraid to stop and reassess if something doesn't look right.
How do I look after my tools?
Keep them clean, dry and organised. Wipe metal tools after use, store drill bits and punches in their cases and replace worn cutting tools before they begin damaging your work. Looking after your tools not only makes them last longer but also helps you produce better results.
Are affiliate links more expensive for me?
No. If you purchase through one of the affiliate links on this page, you pay exactly the same price as you normally would. Amazon simply pays a small commission to Pabloskates for referring the sale, which helps support the free guides and workshop content on this website.
Will these tools help if I'm repairing inline skates as well?
Yes. The vast majority of the tools in this guide are equally useful for maintaining and repairing inline skates. Measuring tools, cleaning products, workshop equipment and photography accessories all work just as well regardless of the type of skates you're working on.
Do you earn money from the links on this page?
Yes. As an Amazon Associate, Pabloskates earns a small commission from qualifying purchases. It doesn't cost you anything extra, and I only recommend products that I either use myself or would genuinely be happy to have in my own workshop.
Last Updated
Last updated: July 2026 I use these tools every week in the Pabloskates workshop. As I discover better products or retire old favourites, this guide will be updated to reflect what I'm actually using.
Final Thoughts
Having the right tools won't automatically make you a better skate builder, but they will make the job easier, more accurate and far more enjoyable. Over the years I've learned that investing in a handful of quality tools often saves far more time and frustration than trying to make do with the wrong equipment.
Everything featured in this guide has either earned a place in the Pabloskates workshop or is something I'd be happy to recommend to fellow skaters, restorers and builders. From restoring vintage hockey boots and mounting custom quad skates to photographing finished builds for the website, these are the products that help me deliver the standard I expect from every pair that leaves the workshop.
I'll continue updating this guide as I discover new tools, replace old favourites or find products that genuinely improve the way I work. If you've found a workshop gadget or clever piece of kit that's transformed your own skate projects, I'd genuinely love to hear about it. Feel free to get in touch I'm always looking for the next workshop essential.
Thanks for reading, and I hope this guide helps you build, restore and maintain your own skates with confidence.
Happy skating!
Paul, Pabloskates Owner
Browse our latest converted skates or get in touch to discuss your dream setup only at Pabloskates.com.
Pre-Built Retro Skates - https://www.pabloskates.com/skates
Skate Parts & Accessories - https://www.pabloskates.com/parts
Custom Build Enquiries - https://www.pabloskates.com/services
Phone/WhatsApp - 07848287929
Email - mail@pabloskates.com


Comments